As Minecraft continues to storm through the world of gaming, education and everywhere else, one thing is for certain: everybody wants to create their own server!
I think that is a great thing.
I’ve run several servers since early 2011, through my GamingEdus project, and we’ve had young players go from casual players to admins of their own virtual world, learning a lot about computers and networks along the way.
For teachers, running your own Minecraft server mean opening a whole new world of play and learning to your students.
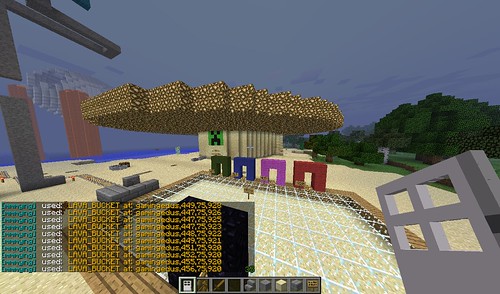
In the rush to be the ruler of their own world, many gamers and teachers forget to secure their Minecraft servers from unwanted visitors who could destroy (aka grief) your builds.
Fortunately, securing your Minecraft server is as easy as activating the server white-list and installing a server wrapper, like Craftbukkit. This post will show you how to do just that.
The White-list: Your very own virtual world bouncer
Open servers, where anyone can show up and build, are a lot of fun, but they’re not for everyone.
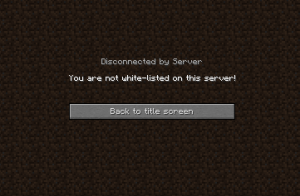
Smaller servers that focus on a particular niche of players (like our GamingEdus Minecraft server for teachers and their families), need some locks on the doors to keep things fun for everyone. Everyday, our server gets random login attempts from people’s avatars. They get blocked because their name is not on the list of approved players, aka the White list.
The White-list is the first line of defense for a server admin (that’s you, if you’re the one installing the server files).
Activating the white-list is like have your own personal bouncer standing at the doors to your virtual world.
Your Minecraft player name not on the white-list? You don’t get in. It’s that simple.
And it’s easy to set up. Here’s how you do it.
Activating your white-list:
1. Stop your server.
2. Open your server folder and find the “server.properties” file
3. Set the white-list variable to “true” and save.
4. In server folder, open white-list.txt file (Update: this file is now called whitelist.json – See Brian’s comment below for details and thanks Brian for the heads up!)
5. Add your player name and the player name of other players you want to have access to the server, then save.
6. Restart server.
Your server now has a white-list!
To add other names to the list, just update the white-list.txt file (you might need to restart the server to have it take effect.)
(When you install the “Essentials” plugin (see below) you’ll be able to update the white-list while in game – much faster.)
Craftbukkit brings extra security
Craftbukkit is a “server wrapper” that basically organizes all the files for your server and allows you to easily add plugins to your server that let you and your players do amazing things (like lock your chests and doors and much more.)
Installing Craftbukkit is more complex and there is tons of stuff out there on the interwebs, so I’ll just direct you to some helpful links:
This wiki page runs you through installing Craftbukkit: http://wiki.bukkit.org/Setting_up_a_server
And here’s a helpful video: https://www.youtube.com/watch?v=M5R7Gf9NKBo
Once craftbukkit is installed, you can add plugins to the world. We use many plugins on GamingEdus.
I wrote a post about the plugins every server should have: Five Essential Plugins for Minecraft School Servers.
Looking at that post now, I need to update it with some of the others I use to keep our servers secure. You’ll just have to wait for another post for those (sorry!)
In the meantime, with Craftbukkit running and your server white-listed, you can be confident that only people you know will have access to your server.
What do you think? What other tips would you give new server admins? What questions do you have about running a Minecraft server? Drop them in the comments below and I’ll see if I can help you out.
–
As an award-winning children’s author, gamer-geek and elementary school teacher, I often have Tech Teaching ideas and project news to share with fellow educators. I deliver these resources and ideas to your inbox in my e-newsletter Reading Change.
If this sounds like something you’d like to receive, then subscribe to Reading Change.
You can unsubscribe anytime and I won’t share or sell your data. Honest.
Thanks!
Liam








Great post.
I already run a server for close friends so have only used white lists for security so far. Now I want to open that server up to everyone who lives in our neighbourhood so kids can play with their real life friends in their own world but I’m uncertain about what securities I will have to do. Hopefully following your posts for your school set up will cover it.
Thanks for sharing.
Hi Ryan – thanks for stopping by. An open server for neighbourhood kids sounds like a lot fun. I would keep the white list running and add the playernames of the neighbourhood kids as you learn them. I’d also suggest you use a plugin like Group Manager to set the permissions of what new arrivals can do (eg. blocking access to lava, tnt and other destructive – but fun – items.) Also, you’d want to make sure you’re running an anti-grief plugin like Core Protect, so you can undo any damage or track down the griefing culprits. Good luck with your server and have fun!
Great advise thanks, looks like you need to get that ‘updated list of plugins you should have’ post on the agenda!
You are totally right Ryan! I’ll add it to the “upcoming” list of posts for gamingedus.org – but will repost it here. We’re always looking for new post ideas and I totally forgot about that one. 🙂
Hi, I was wondering if it would be safe for me to create a server running off of my home computer for me and another friend. I am using the yogscast complete pack if that makes any difference. (When I say safe, I mean not vulnerable to virus’s and attacks ect)
Feedback is greatly appreciated 🙂 🙂
Thanks
Hey Robert,
That’s a great question, but before I answer I’ll do the “I’m not a sys admin” caveat and say don’t take what I say as the be all and end all. But here it goes . . .
To run a server on your home computer, you’re going to have to “port forward” on your router (google it). It could make your home network less secure, but you should be okay if you are running an up to date virus protection and firewall on your computer and router. To be extra safe, you can shut down the world when you and your friend aren’t playing. That way, even with the open port, there’s nowhere for a malicious bot/hacker to go.
I’m glad to hear you’re interested in setting up your own server. I learned so much about computers, routers and networking from setting up our GamingEdus server. I’m not an expert by any means but it was much more rewarding than going to a hosting service.
Good luck with your server and thanks for dropping by!
Thanks for this post Liam, very instructional and good for someone like me who’s trying to setup a Minecraft sever for the family kids to play together. As we moved abroad my intent is to use this server to allow my kids to interact more with their relatives that are now far away. Really excited about it! 🙂
But I was wondering about the other security related plungins you briefly mentioned. I did search your blog I didn’t find that possible “future post” you mentioned. Could you maybe simply list some/all of their names just as a comment so that I can have a lead on what to look for? 😉
Hey Carlos – you are totally right! I promised another post about plugins and totally forgot. I will fix that very soon. Promise (again.)
If you want more Minecraft guides, check out the Guides for Teachers section on gamingedus.org. Lots of good stuff there for teachers and parents.